Saturday, 24 March 2012

"Tandoori" chicken

I've recently purchased a load of different spices to make a curry. I must say now that it is very like me to get excited over a single recipe, and a determination takes over me and I must make it, despite how many ingredients it requires. These ingredients I very rarely have, so I embark on an epic shopping expedition, where inevitably I only find half the things I need. The recipe becomes a compromised hodge-podge, a husk, a sham. I'm left feeling slightly bereft, and with a cupboard of ingredients I'm likely never to use again. I had a storecupboard clear out last week, and found jars I didn't know existed, never mind ever used. You see my problem. I wanted to make tandoori masala, and even with my now extensive range of spices, I still only had half the ingredients to make it. What's more, the shops didn't have the remaining items. Feeling brave, I got out my pestle and mortar, and my spoon, and set about concocting.

Ingredients:
4 chicken thighs, skinless and boneless
2 dessert spoons each of:
Cumin seeds
Fennel seeds
Coriander seeds
Fenugreek powder
Garam masala
Paprika
Hot chilli powder
Cayenne pepper
 A pinch each of turmeric and ground black pepper
1 inch piece of ginger, peeled and grated
3 cloves of garlic, peeled and grated
 1 tablespoon of vegetable oil
Juice of 1 lime

A handful of fresh coriander, chopped - to serve

Method:
Crush the fennel, coriander and cumin seeds in a pestle and mortar. Place in a bowl. Add the fenugreek, garam masala, paprika, chilli powder, cayenne pepper, black pepper and turmeric. Massage the minced garlic and ginger into the chicken thighs. Place the thighs in the bowl with the spices. Add the vegetable oil and the lime juice, and mix together, either with your hands or a spoon. Cover the bowl with plastic wrap and refrigerate for a few hours, or overnight if you want.
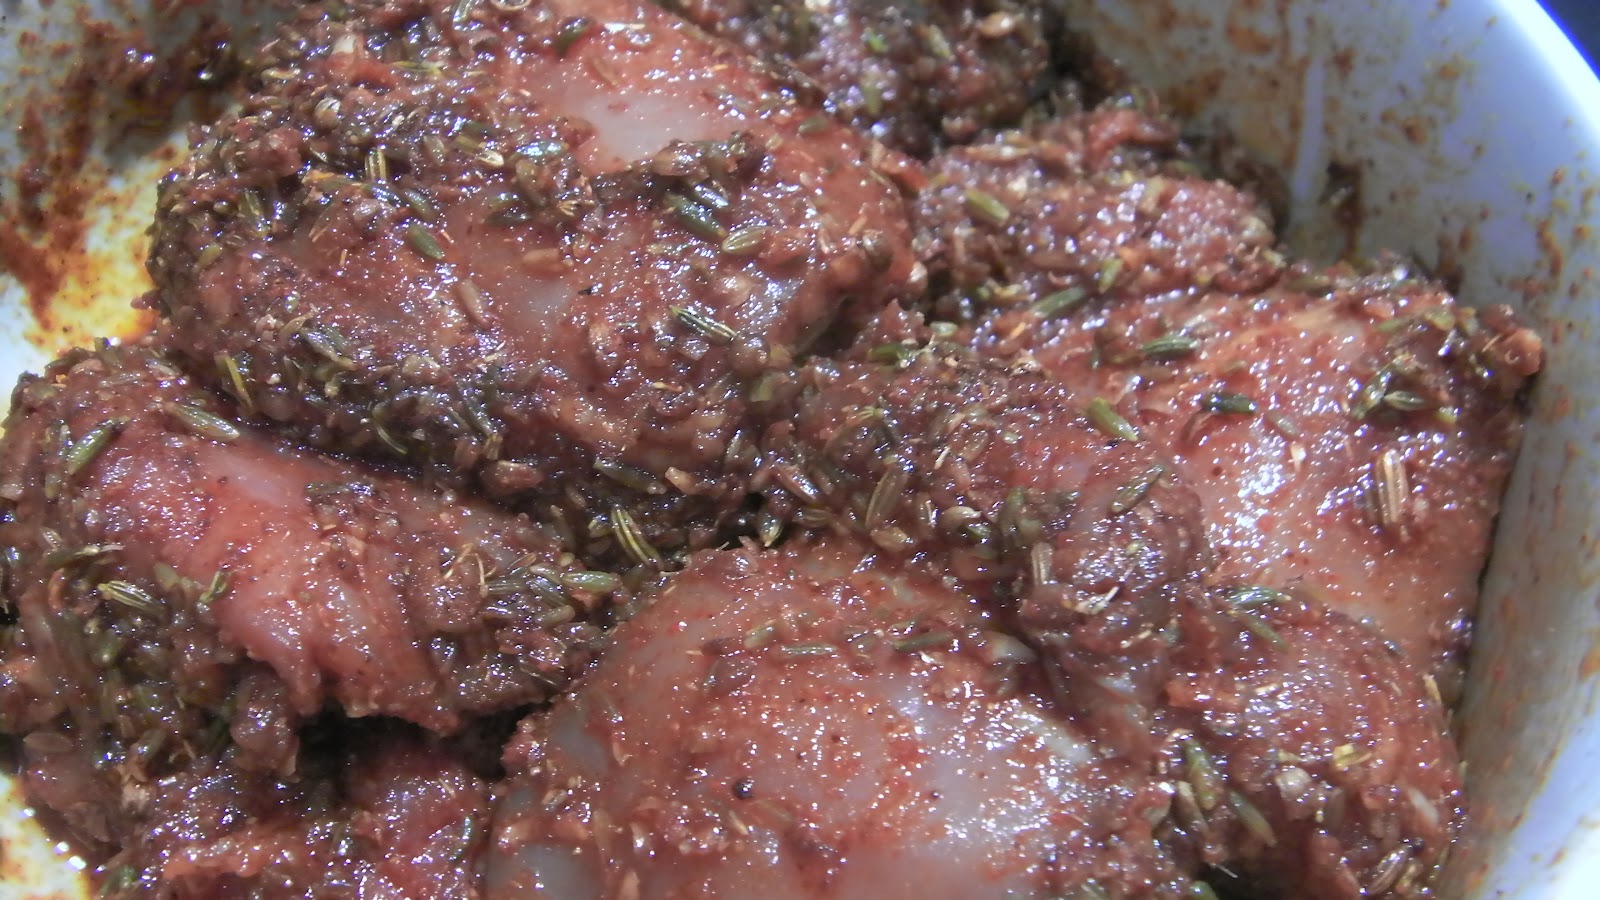

Preheat your oven to 200 degrees centigrade. Take the chicken out of the fridge 20 minutes before you want to cook it, so it has a chance to come to room temperature. Line a baking tray with foil, and place the chicken on the tray. Place in the oven and cook for 25-30 minutes until the chicken is cooked all the way through.

Serve with coriander and fresh lemon or lime wedge. Ooh it is good!

Sausage, Halloumi and Red Pepper Bake


This is a yummy one, courtesy of a certain Saint Nigella. I love her recipes - they are always simple to follow (which is great for me) and yield consistently rewarding results. My partner loved this - he said it was a nice treat for a Friday night. This would be great for a party, as you can very easily change the quantities to suit you. Nigella uses Merguez sausages, which I couldn't get hold of, so I just used some good quality pork and chilli sausages. I also couldn't find any jarred flame-roasted red peppers, so following Nigella's instruction, I used thinly sliced raw red pepper instead.

We served this with a baguette, plenty of extra virign olive oil, and a green salad.

Ingredients:
6-8 spicy good quality sausages
1 block Halloumi cheese, thinly sliced
1 jar of roasted red peppers, or thinly sliced raw red pepper
1 tablespoon olive oil

Method:
Preheat the oven to about 220 degrees centigrade. Take a large baking tray or oven proof dish, and throw in the sausages, the sliced Halloumi, and the pepper slices, and drizzle with olive oil. Bake in the oven for 20 mins until the sausages are cooked all the way through. If you are using raw peppers instead of jarred, you may wish to put these on the tray first and cook them on their own with some olive oil for about 5 minutes, just to give them a head start before adding the sausages and cheese.

The recipe is from Nigella Lawson and is available on BBC Food at the following link:  http://www.bbc.co.uk/food/recipes/sausageswithhalloumi_87396

Monday, 12 March 2012

Salami and bean stew


This was inspired, as most things inevitably are, by the great Nigella Lawson, through her recipe for salami and cannellini bean pasta. I make her recipe quite often, convenient as it is, but I often feel that, especially for a weeknight, the combination of the beans and pasta is too heavy. I had an idea to lighten it up (but still keep it satisfying) by adding more water and then spending a bit longer thickening up the sauce. I also add whatever fresh vegetables I have to hand, and use haricot beans instead of cannellini for a bit of variation (you can of course use any beans you have in the house). I add spice to this, just because I feel it needs livening up, and it makes a perfect partner to the savoury saltiness of the cured meat.

Recipe:
1 packet sliced cured meat like salami, cut into strips
400g tin chopped tomatoes
2-3 cups of water
Pinch of sugar
1 cup diced celery
1 cup diced peppers (any colour)
1 red or green chilli, finely diced (use as many chillis as you like, and keep the seeds in if you're a spice fiend)
Pinch of cayenne pepper
Freshly ground sea salt and black pepper
1 or 2 cans beans (the choice is yours!)

Method:
1. Heat a wide heavy based frying pan on high heat. Once hot, throw in the sliced meat (no oil is needed - the fat from the meat will be sufficient).
2. Fry the meat until it is slightly coloured and crisped up.
3. Add the diced vegetables and chillis, and fry off for a few minutes until slightly softened.
4. Add the chopped tomatoes, pinch of sugar and the water. Bring to the boil, and turn the heat down to a simmer.
5. Add the cayenne pepper, and the salt and black pepper. Simmer for 10 minutes.
6. Add more water if you want the stew to be a little more like a soup.
7. Drain the beans, rinse, and add to the stew. Cook for a further 10 minutes on a low heat, or until the beans are nice and tender.
8. Serve with some garlic bread if you fancy!

Tuesday, 24 January 2012

Homemade pizza...with sausage!


I love homemade pizza but I often find myself struggling to work up the energy to do it the "proper" way - with yeast. I tried a naan bread recipe a while back and realised how great it would be as a pizza base. I use the BBC recipe by Anjum Anand, and it really is a simple, quick and easy way of making pizza (and of course, naan bread!!!) I get two 12" pizza bases from one batch of this dough, but I roll them extremely thin because that's how we like our pizzas.

Makes 5 naan breads or 2 very thin 12" pizza bases, or 1 thin crust/medium 12" pizza base:
250g/9oz plain flour
2 tsp sugar
1/2 tsp salt
1/2 tsp baking powder
110-130ml milk
2 tbsp vegetable or olive oil

1) Sift the flour (if you can be bothered - I rarely do) into a bowl with the sugar, salt and baking powder. Mix together with clean hands. 
2) Make a well in the centre of the dry mixture, and pour in the milk and oil. Take a fork or small spoon and gently begin to stir the dry ingredients in from the outside into the centre.
3) Once the mixture starts forming together, you may want to flour your hands and begin to knead it together. If it's too sticky at this stage, keep adding flour a little at a time until it's a workable texture.
4) Knead it for as long as you can be bothered (I rarely knead it for more than a few minutes) and set it aside until you're ready to use it.
5) Take your dough and split it into sections depending on how many pizzas you want to make. Flour a rolling pin and roll out your pizzas.

These are now ready to turn into pizzas!  Spread one tablespoon of olive oil onto the uncooked pizza base. This stops the tomato sauce from making the pizza base soggy. Then spread your pizza sauce (you could make your own, but I just use tomato paste) over the base. Then add your cheese, and any toppings you fancy. I used the sausage mixture from the Jamie Oliver sausage fusili recipe (posted here on 24th November 2011). Here you can see an uncooked version next to a cooked version! These went into a preheated oven for about 10 minutes on about 200 degrees centigrade.


The original recipe for the naan bread can be found on the BBC website at: http://www.bbc.co.uk/food/recipes/naan_86626

Friday, 30 December 2011

Tonkatsu

Tonkatsu (or breaded and fried pork) is a favourite in our house, as is the chicken version, which we just call "katsu". Here's the recipe for the tonkatsu and a sauce to go with it. I always shallow fry my katsu but you can deep fry them at around 350 degrees fahrenheit. If you want to use chicken instead of pork, follow the same recipe as below but use boneless skinless chicken breasts or thighs.

Serves 2:
Tonkatsu:
2 pork loins or cutlets
1 cup of plain flour
1 egg, beaten until combined
100g Panko breadcrumbs, or any Japanese style flaky breadcrumbs
Half a cup of cooking oil

For the sauce:
1/4 cup dark soy sauce
1/4 cup regular soy sauce
1/4 cup worcestershire sauce
3/4 cup tomato ketchup
Method: Add all of the above ingredients to a bowl, whisk together until the texture thickens slightly. Taste and adjust with ingredients above until it is to your liking

Tonkatsu cooking method:
1. Remove any excess hard fat and rind from the pork loin or cutlet. Cut along the remaining fat on the outside and inside of the pork to ensure it isn't chewy when cooked.
2. Place the pork between two pieces of cling film and bash with a rolling pin until around 2 cms thick.
3. Put the flour on a plate and dredge the pork in the flour, ensuring they are evenly coated. Shake off any excess flour and dip the pork into the beaten egg. Leave for a few seconds to soak and then remove any excess. Finally, dredge the pork into the breadcrumbs. Use your fingers to really get the breadcrumbs onto the pork - they really need to stick. Leave to stand for a few minutes.
4. While the pork is resting, heat the oil in a frying pan on a medium to high heat. You can check the temperate of the oil by dropping in a few leftover breadcrumbs. If they sizzle, it's time to add the pork.
5. Cook the pork for a few minutes on either side until golden brown. If they start to colour too much, turn down the heat. Once fully cooked, remove from the pan and leave to rest of a wire rack. If you're in doubt as to whether they're fully cooked or not, cut the tonkatsu at the thickest part of the meat to check.
6. Once the tonkatsu has been drained of any excess oil, place on a plate and cut into approx. one inch thick strips. It's ready to munch!

I serve mine with steamed jasmine rice and the sauce as desribed above. Here's the finished article!

Monday, 12 December 2011

Dinner for one

I found myself alone in the house on Friday night. I don't particularly like being alone, but my partner had his Christmas work "do". Whenever I am eating alone I decide to literally make a meal of it. I think eating alone doesn't resign the diner to something boring. It can still be a good meal, especially if accompanied by a glass of wine!

Therefore on Friday night I decided to go a bit "Nigella" and do a pancetta salad with a dijon mustard dressing and parmesan. The recipe is on the Food Network website: http://www.foodnetwork.com/recipes/nigella-lawson/mixed-greens-with-pancetta-and-shaved-parmesan-recipe/index.html


This salad was so delicious - richly savoury and at the same time very fresh and light. As you can see the parmesan cheese on top was a bit of overkill - but it was Friday night!

Tuesday, 6 December 2011

Cheese and tomatoes

I'm a great believer in the saying "If it ain't broke, don't fix it". Just such an example of this is my Dad's grilled cheese and tomatoes. My Dad used to work quite late so my mum, my sister and I often had our evening meal before he got home. When he came back, no doubt he was ravenous, and he grabbed ingredients which needed little time to cook but provided instant gratification. His absolute favourite was grilled cheese and tomatoes. He had a battered old oven proof dish which he would fill with sliced cheese (usually cheddar, and he didn't bother to grate it), sliced tomatoes, and a dash of white pepper. It would go under the grill until the cheese melted and became golden on the surface. He used to eat this straight from the little dish it was cooked in (saves on the washing up!) alongside a nice chunk of bread.

I remember the smell of this cheese and tomato feast wafting upstairs. I would often go downstairs and sit with my Dad while he ate. He would let me dunk some of the bread into the melting cheese, and I just remember how heavenly it was. It was perfectly simple family food. Something to share (although I presume his intention was to eat it himself - and quite rightly!)

My plan is to make this for Christmas Eve lunch, just as I am settling into the relaxation and indulgence of Christmas. It requires so little effort, and so few ingredients, but its rewards are great.